Connecting Raspberry Pi to Microsoft Azure with Python3
Introduction
One of the best uses for the Raspberry Pi is in embedded IoT projects. For simple, linear data logging projects, all you need is to add new lines to a Google Sheet. However, there are times when you need the power of a remote database to do the hard work for you. One of the most robust options is Microsoft Azure. I'll show you how to create a new SQL database, install and configure the needed Python modules, and then test to see if everything worked. This tutorial is running on a fresh install of Raspbian-2015-02 with all updates installed as of 2015-04-02.
One note before we begin: This tutorial is for Python3, and we will use the Python3 version of pip to install the modules. I'll mention how to install the Python2 version of the modules, but I don't guarantee everything else will work the same. If you don't have Python3 pip installed, you will need to install it via apt-get with the following line:
sudo apt-get install python-dev python3-dev python3-setuptools python3-pip
Azure SDK
Microsoft offers an official open-source Python module which you can use to tie into Azure tables and blobs among other things. If it's not necessary to have a full SQL database for your project, this is going to be the easiest way to tie into Azure. Read the reference docs in the Azure Python Dev Center before moving on. The great thing about this method is that it's already configured once installed. If you are using Python3, these two lines will install everything:
sudo apt-get install libffi-dev
sudo pip-3.2 install azure
There's only one dependency to install before we do the pip install. Unlike the Python2 version of pip, pip is customized for each new Python version. As of the Feb2015 version of Raspbian, Python3.2 is the default, so we use pip-3.2 to install. You can install the Azure module for Python2 with apt-get:
sudo apt-get install libffi-dev azure
One of the downsides of the azure module is that it doesn't include a way to access our Azure SQL databases directly. For that, continue reading.
Create SQL Database
For the sake of clarity during this tutorial, I'm going to make a new SQL database and use the actual server name, user name, and password in plain text during module setup. By the time you read this, the server will have been deleted, so make sure you replace the tutorial data with your own.
The first thing we need to do is create a new SQL database. If you already have a database you want to tie into, you can do that too. If you already know your existing server name, database name, database user name, and database password, skip to the next section.
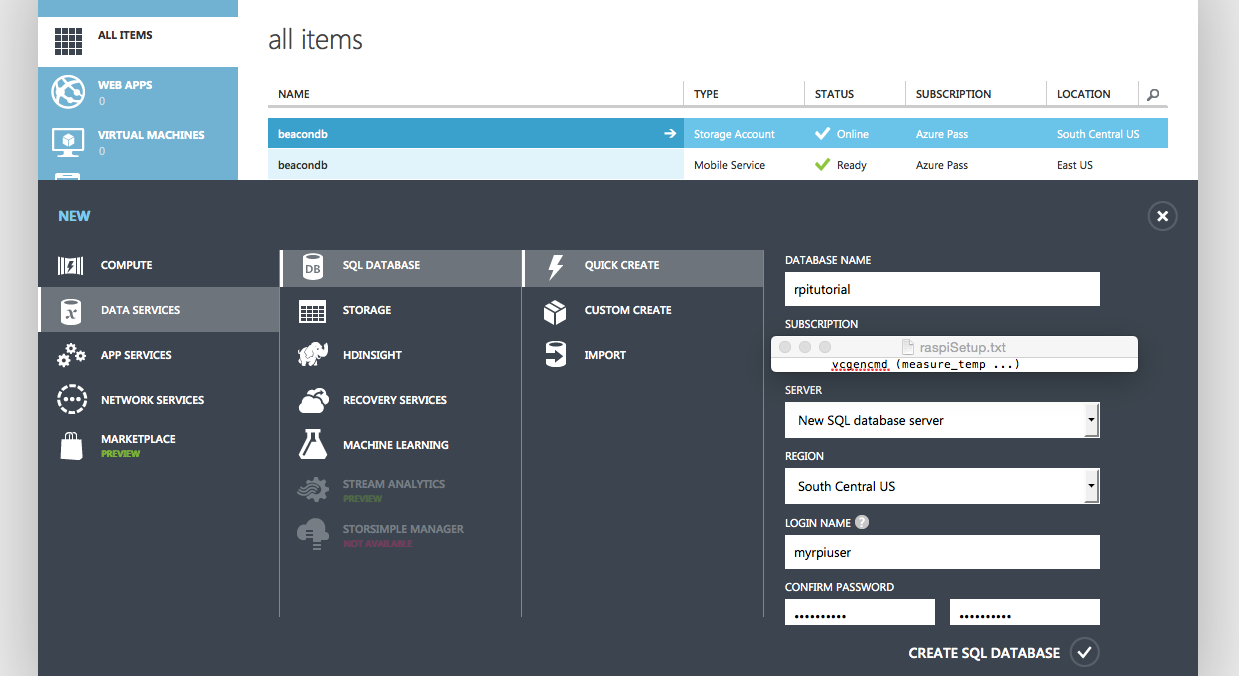
First we create a new SQL database from the Azure Dashboard. Using quick create, we supply a name for our database, a user name, and a user password when we select "New SQL database server". If you wish to connect to an existing server, this is where you can do it as long as your remember its user name and password. For this tutorial, our database name is "rpitutorial", user name "myrpiuser", and password "Raspbian#1".
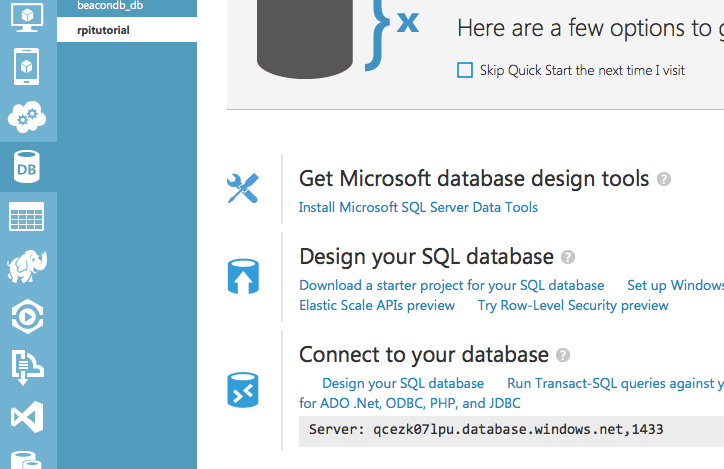
Now that we have a new SQL database, the last thing we need is the server address the database is hosted on. Conveniently, it can be found at the bottom of the database dashboard page. For this tutorial, our server location is "qcezk07lpu.database.windows.net" on port "1433".
At this point, we have everything we need to continue. You might want to take the time to add some data to the database using the Management portal you can access by clicking the "Management" button on the black bar at the bottom of the page. I added a new table Trivia with questions and answers.
Install pyodbc
Now that we have a server ready to go, it's time to install and configure the Python modules. In order to do SQL queries, we're going to use pyodbc. It will give us a Python wrapper to use two other UNIX database utilities, each of which need to be individually configured. If you are unfamiliar with pyodbc, check out its "Getting Started" guide. The dependency installation is via apt-get with this line:
sudo apt-get install unixodbc unixodbc-dev freetds-dev freetds-bin tdsodbc
Now that the dependencies are installed, they need to be configured.
First we need to configure a generic connection to our server. Use
sudo nano /etc/freetds/freetds.conf
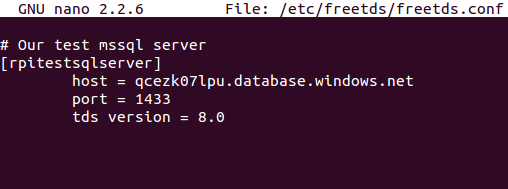
to edit the first file. At the end of the file, add the following lines:
[rpitestsqlserver]
host = qcezk07lpu.database.windows.net
port = 1433
tds version = 8.0
You can use any name you want in those brackets as long as it doesn't contain any spaces. Use ctrl+x and then y + enter to save the file.
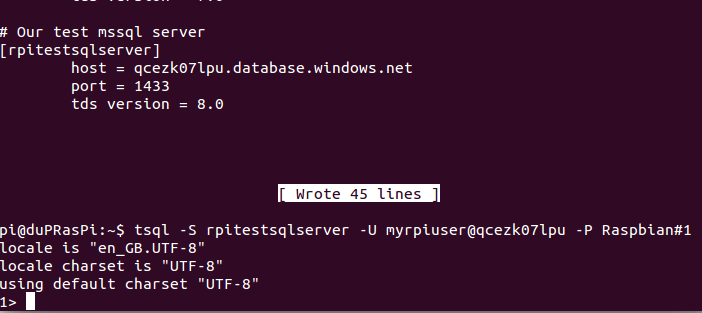
Now we can test to make sure the config file works. We're going to use the tsql utility. It needs the name of the configuration from the previous file, the user name (and server ID), and the password.
tsql -S rpitestsqlserver -U myrpiuser@qcezk07lpu -P Raspbian#1
If the config file is correct, you should eventually see a prompt line like that in the screenshot above.
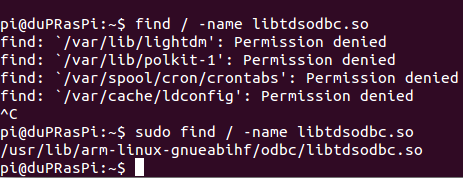
Before we can move on to the next config file, we need to locate two driver files, libtdsodbc.so and libtdsS.so, whose locations differ depending on the Linux distro. The find utility is better than grep at finding file names, but it does need root permissions to access certain root directories as shown above.
sudo find / -name libtdsodbc.so
sudo find / -name libtdsS.so
The files should be located in the same directory, but it doesn't hurt to check. I found mine in /usr/lib/arm-linux-gnueabihf/odbc/
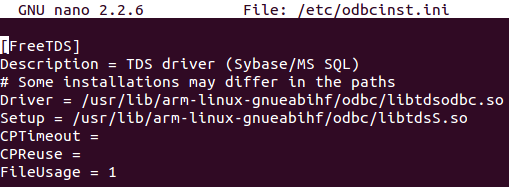
Now we can configure the driver config file. Use nano to open the existing empty file:
sudo nano /etc/odbcinst.ini
Add the following lines as-is unless your driver and setup locations are different:
[FreeTDS]
Description = TDS driver (Sybase/MS SQL)
Driver = /usr/lib/arm-linux-gnueabihf/odbc/libtdsodbc.so
Setup = /usr/lib/arm-linux-gnueabihf/odbc/libtdsS.so
CPTimeout =
CPReuse =
FileUsage = 1
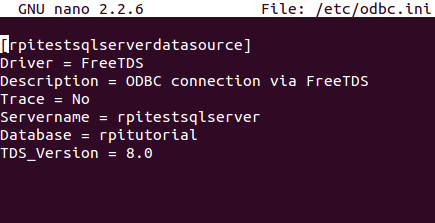
Only one more config file. Again load it into nano:
sudo nano /etc/odbc.ini
This file will need the config name we used in freetds.conf and the name of our database. You should give this new config name something that identifies it as using the previous config name. Here is what it looks like for this tutorial:
[rpitestsqlserverdatasource]
Driver = FreeTDS
Description = ODBC connection via FreeTDS
Trace = No
Servername = rpitestsqlserver
Database = rpitutorial
TDS_Version = 8.0
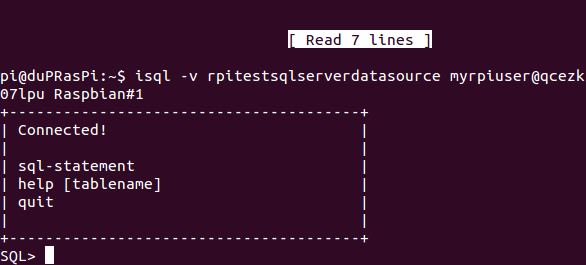
Now that we have all of our dependencies configured, it's time for one final test, this time using isql. It looks similar to tsql with the -P parts missing. Just make sure that it uses the config settings we just made.
isql -v rpitestsqlserverdatasource myrpiuser@qcezk07lpu Raspbian#1
Once your screen looks like the screenshot, everything is successfully configured. You can make a few sql queries to verify that it's working.
After all of that, it's now time to install pyodbc. As with the Azure SDK module, we'll install it via pip for Python3.
sudo pip-3.2 install pyodbc
To install it on Python2, use apt-get.
sudo apt-get install pyodbc
Testing
Now it is time to test our installation. Open up a python3 shell and following along with the code below. It shows me connecting to the SQL database and reading data from the table I created earlier.
pi@dupRasPi:~$ python3
Python 3.2.3 (default, Mar 1 2013, 11:53:50)
[GCC 4.6.3] on linux2
Type "help", "copyright" or "license" for more information.
>>> import pyodbc #If anything went wrong during installation, it will happen here
>>> dsn = 'rpitestsqlserverdatasource'
>>> user = 'myrpiuser@qcezk07lpu'
>>> password = 'Raspbian#1'
>>> database = 'rpitutorial'
>>>
>>> connString = 'DSN={0};UID={1};PWD={2};DATABASE={3};'.format(dsn,user,password,database)
>>> conn = pyodbc.connect(connString) #If anything went wrong during configuration, it will happen here
>>> cursor = conn.cursor()
>>> cursor.execute('select question, answer from [Trivia]')
<pyodbc.Cursor object at 0xb67bc9f8>
>>> row = cursor.fetchone()
>>> if row: print(row)
...
('What is my favorite IoT platform?', 'The Raspberry Pi, of course!')
conn.close()
quit()
Now everything is working. We create the connection string, connect to the server, perform a query, read the response, and finally close the connection. Of course you can do more than just read database contents. The pyodbc module makes it easy to do anything with standard SQL queries. It will hold response data so that it's easy for you to manage whether your query returns ten rows or ten thousand.
What will you make with Azure?